Wednesday, May 14, 2014

Recipe Card D.I.Y.

Confession: I don't like to throw things away. However, I do sometimes and I recycle lots in order to be a high functioning hoarder.

I enjoy the fun little mementos in life, that I stumble upon or that are sent to me by like-minded friends around the country. Moving can also make you feel more close to these items; so above you will see an awesome card sent to us by Miriam, now turned into a recipe card.  (It is really too bad that I didn't save this card for a pig in a blanket recipe.)

I first had this idea after our wedding.  We had lots of fantastic cards and due to our St. Louis hosted wedding shower, we had tons of great recipes. Additionally, I had been stashing clippings in an old medical clipboard and thus the idea for melding these two piles of paper was born.

I have been stashing my torn out magazine articles and cards in a little rack that I keep next to the couch. When I get a good supply going, I gather my materials and set to work.  You will need the above listed items.

Plan your pairing and decide on how you will fit the information onto the card.  This is a bit like Photoshop 1.0.  I often make very creative folds in order to keep all the info from the magazine or newspaper recipe.  They really don't plan for folks to conform the info into a standard recipe card box.
I use a standard sized index card to trace and use for sizing purposes.  Then I play with the pieces until they fit. 

 For this card I only glued a portion of the left hand side down so that I could fold the recipe under.  Plus I can still read some of the message on the card!
This project will inevitably lead to another, as my recipe card holder is already full- AB and I will be working on a wood container to dazzle you with at some other post along the way.


Tuesday, May 6, 2014

Marcel's DIY kitchen floor

It started some many months back when we brought our new puppy home.  We placed his kennel in the kitchen and as he has grown out of that first kennel, the kitchen is pretty much his space.  He stays there when we are away and sleeps there overnight.  Our long range home improvement plans include a kitchen overhaul, so we are dreaming up those ideas now.  However, when Marcel's snack time began to include the berber carpet in the kitchen, our ideas seemed to focus there more and more frequently.  Marcel's demolition accelerated over the tough tax season and two weekends past it became apparent that the work would need to be done quickly on the floor.

Marcel looking up from his delicious demo.

We removed the fridge and the stove and rolled them into the living room.  After removing the last of the carpet, we could see what kind of surface we were working with.  All told it was pretty clean to start from and no need for other removal.
We also pulled up all of the floor edging and stashed it for safe keeping.

So, AB and I grabbed our wedding gift cards to Menards and we hit the road with our floor measurements!

We bought a 12' x 11' foot roll of vinyl flooring.  As the very helpful hint sign at Menards suggested: Helpful Hint- Always buy enough material for your project!  (I can only imagine what has necessitated the need for such a sign.)  We also purchased the matching floor adhesive necessary and the edge kits for the doorway to the living room and the one that heads to the basement stairs.  The rest of the materials and tools we already had at home.


When we got the flooring home, we set to work patterning it to fit exactly to the space.  It was like cutting a dress pattern out of a really sturdy yet flexible material.  We did pull the vinyl outside to make some of the major cuts in measurement.  We used a heavy duty utility knife and a straight edge.
The next step we took was to apply half of the adhesive to our floor.  And we chose which half carefully so we didn't paint ourselves in.  I used a paint roller that we didn't mind scrapping at the end of the project.  We allowed the adhesive to dry for an hour (and we took Marcel for a walk while we waited.)

When we returned we lay the floor down over the adhesive side and used fabric covered blocks to smooth out and avoid any air pockets.  We also allowed the boss to test his space for quality assurance purposes.  Although a bit unsure of how this flooring would taste, Marcel seemed to be ok with the results thus far.

Our next step was to roll up the half of the vinyl that had not yet been stuck down and repeat the adhesive process. 

We were sure to keep the adhesive approximately 3/4" away from all edges so that one day when we get to those bigger kitchen improvements we can pull this vinyl back up and replace with something impervious to dogs.  There was another hour wait for the adhesive to dry (this stuff is strong so we kept the front and back screen doors open while we waited.  When it had dried to a transparent color we then rolled the vinyl into place and proceeded with our smushing technique. (There may or may not have been some singing of Salt n' Pepper while doing this.)  We reconnected all of the base trim and cut the new edgings that merge the vinyl into the other spaces to fit in the doorways.

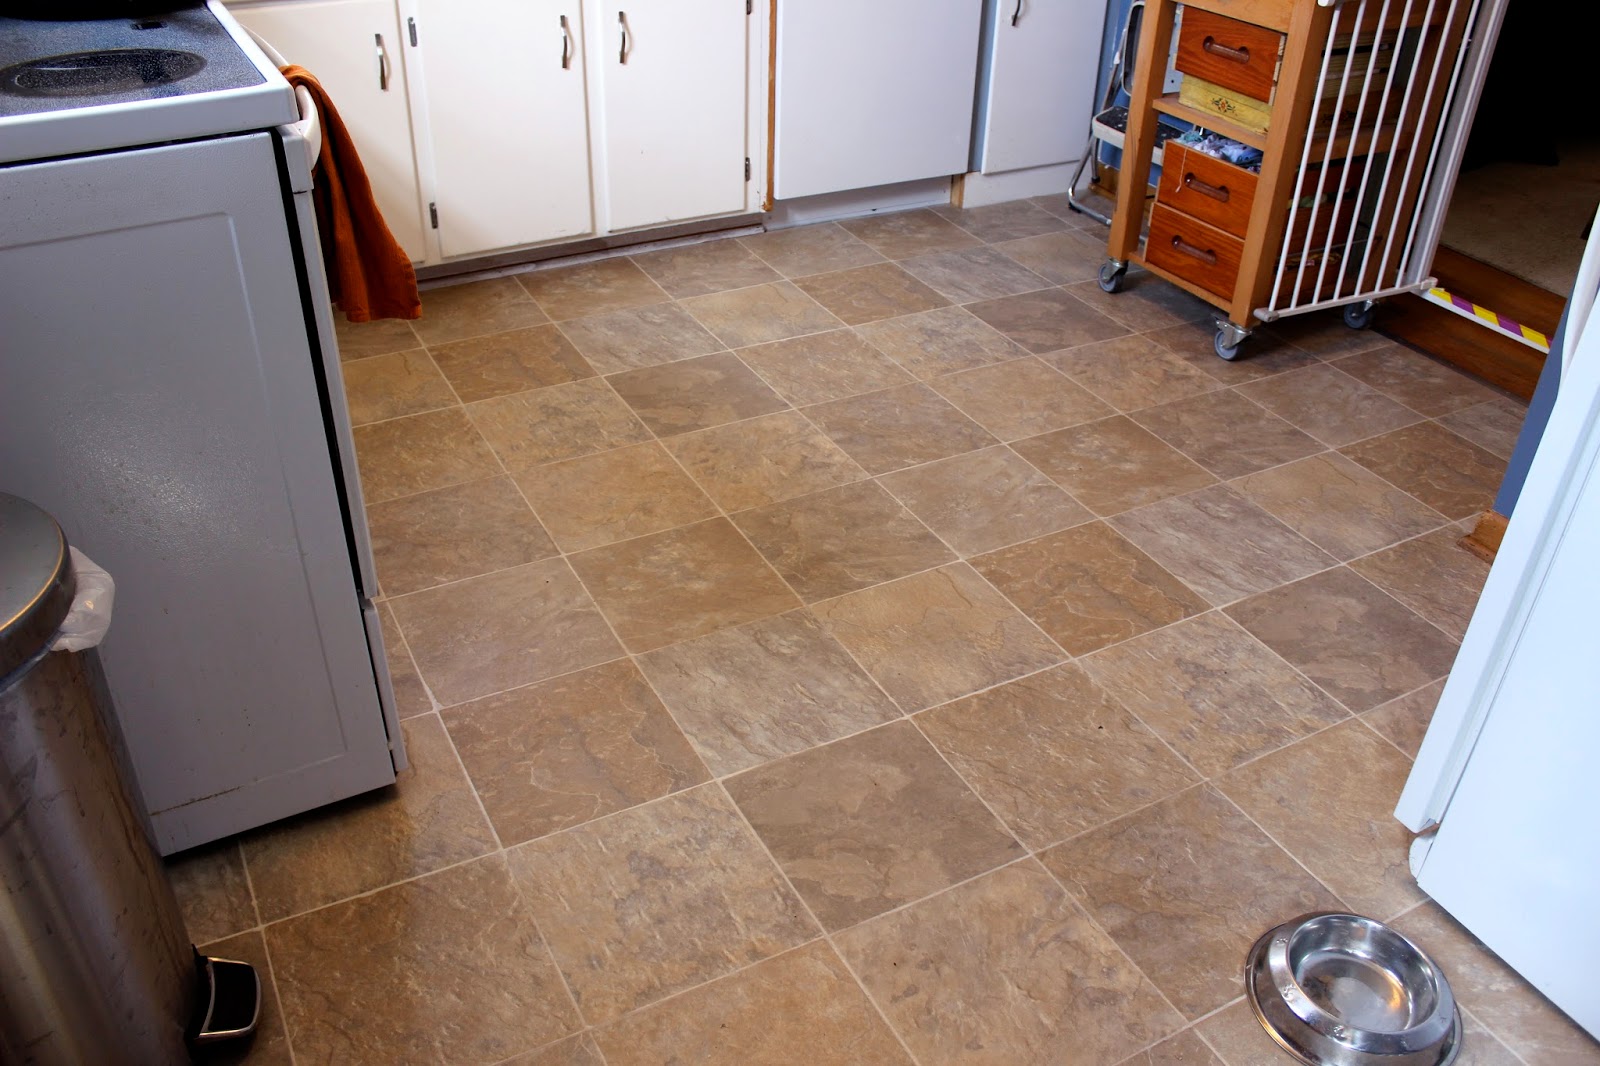
This dried overnight with as little foot traffic as possible and then in the morning we moved the fridge and the stove back into place.  We now have a new and much easier to clean floor.

The finished result is a good temporary solution to Marcel's munchies, or so we hope...

Tuesday, April 29, 2014

Curb Furniture Upcycle: Part TWO


Continued, now to the weaving...

Step 1: After the cotton was completely dry, I rolled it into a ball and attached one side the the side rail of the chair's seat.  I made the knot as tight and clean as possible.  Later I will neaten the edges.
Step 2: Use the left and right side rails of the seat to form the warp.  In this case I wrapped all the way around the outsides and tried to keep each warp about 1/2" apart. I did get really lucky on the yardage; had things not worked out I would have made my warp a bit further apart each wrap to adjust.  You can also add it all up before hand so that you have the exact amount needed to dye.

Close up of my initial knot.  Also important and helpful along the way was to tape the ends so that they didn't fray as I worked.  
Step 3: Continue wrapping warm until you get to the front edge of the chair.  Once there I bound off similar to the above knot.  Taking efforts to secure it very tight.


Step 4: Begin weaving.  I tied on a new and un-dyed chord to the rear of the chair and began weaving the thread through from back to front and then back again.  This portion took the longest time and was a bit of a hand workout.  As I approached the other side of the chair I needed a helper bar to assist in moving the weft into even positioning.


In order to tie off at the end, I used my same tactic to make sure that I pulled it very tight and then worked to tuck the knots to the interior of the chair.  I did end up sewing some of the knots together in order to make sure they didn't come undone.

And Voila! After a lot of hand brutality a lovely dumpster chair.  I will be using this little inspiration corner for coffee and morning brainstorming, and maybe even the writing of this here blog.

Monday, April 28, 2014

Curb Furniture Upcycle: Part One


Driving home the other day, AB and I saw a really nice wooden chair at the curb of a nearby house.  Not being one to pass up awesome potential, he stopped and placed the chair in the back of the car.  We sometimes act in haste with our interest, but in turning over a new leaf of being proactive and not letting a project sit, I started in on the chair quickly.  The first step involved a trip to the hardware store to get some paint samples, the chair was already turquoise but it needed a bit of touch up.  Marcel and I spent a nice day on the front lawn repainting the chair.  
But then the real fun began! DYEing of the fibers--

Here are the quick steps for how I ombre dyed my cotton clothesline.
Spin the fiber a hank- without the fancy contraption, you could use your arms or the backs of chairs.

To prevent tangling while dyeing, make ties like this at both ends of the string.

Work on sliding the ends in a figure eight shape around the bulk of the fibers. 


Tie off and repeat at other end. Then remove the skein fibers off the winder.
Soak the skein in water, so that the fibers become saturated.
For cotton fibers, I use Rit Dye, I have a stainless steel container that is labeled as DYE ONLY.  You don't want to eat out the container you use to dye in.  
Mix water, Rit, vinegar and salt (I no longer measure, but you can follow the directions on the package.)  I use a pair of wooden chopsticks to mix and these stay with my dye container, again not to be used for food.  I do place this bowl on the stove on a low heat, for the first 15 minutes of the dye time.  This will help to make the color bolder. 
Allow the excess water to drain from your skein before placing into the dye bath.  I wanted to encourage some seep dyeing and so part of my skein stayed out of the bath, thus creating a bit of an ombre dye look.


Run the skein under water beginning with hot and running progressively colder until the water runs clear.  I then also heat set the dye by placing the skein in the dryer on a dry rack for 45 minutes.  I then allowed the skein to dry completely overnight before continuing to the weaving process. 


Friday, April 25, 2014

Finishing... a difficult thing.

Making and finishing are two completely different things.  I think piling is also a form of making, and I have been piling for a while and now it is time to mine the piles and really put the finishing touches on items.  And what better reason to be encouraged to finish than a deadline?  I have just that... a show in St. Louis at Craft Alliance is looming in the near future and so I mine and refine!

Front of Root Collar
Detail of embroidery and sequins on Root Collar
Back of Root Collar
Rings and Rows Determine Age


            Rings and Rows Determine Age
                Growth of Cells
                Keep the Time
                As Fingers Tapping
                Wood Beat, Heart Strength


And of course now that these pieces are "hang-able" I need a bit of time to digest where all this making is heading.  They are all explorations of the material and the concept of wearable, but outside of that... I have some work to do on the artist statement.

Wednesday, April 23, 2014

Stacked Pies- Oh My!

In order to provide proper background on this post it is important for readers to know that I have often found myself running in circles of creative individuals.  Sometimes arts creative, and very often food creatives.  Maybe I don't like that whole starving artist thing (said ironically while beginning my liquid diet for today).
During my time at the Pulitzer, there was certainly a shared love of food between staff, artists and even visitors.  I learned about the STL origins of hot and sour pickles from Silas, Lisa schooled my grape nuts into a cookie, lovingly referred to as a Schnut and Sarah found this article on stacked pies.

So it is no surprise that this culinary experiment should coincide with my last fast trip in to the Lou...
Behold, the Stacked Pie! And a nice side of citrus (not pictured is the bacon to help add a little burst of protein.)

Stacked Pie Recipe (as shown):
 All items purchased at Trader Joe's- purely where Sarah works, not a plug.

1 Jar or Carmel
3 Pies (Almond Apricot, Strawberry Rhubarb and Raspberry)

Choose a firm walled pie for the base, we used the Almond Apricot, then layer with carmel and place on the next pie.  Spread another layer of carmel and then carefully add the next pie.  You could use more pies if you choose, just be prepared for some structural issues.

Hot and Sour STL Pickle

1 peppermint stick
1 Hot Pickle (often found at gas station convenience stores)

Bite or cut the end off the pickle, and cram the the peppermint stick down the middle.  Wait for the magic of chemicals to occur, then enjoy.  (I am almost certain that the chemical reaction rips the outer layer off your teeth so be ready to brush following this, or suffer the consequences on your next dental visit.)

Schnutz (aka Schnuck's Grapenuts)
If you don't live near a Schnuck's grocery, any off brand Grapenut Cereal will work well.

1/2 Cup Butter, softened
1/2 Cup Sugar
1 1/4 Cup All Purpose Flour (I often use whole wheat)
1/2 Cup of Grapenut Cereal (plus more if you dip the finished cookie in chocolate)
2 tbsp. of OJ Concentrate or Fresh Squeezed Juice
1 tbsp. Orange Zest
1 Egg
1 tsp. Baking Powder

Preheat the oven to 350*F.  Beat the butter, sugar, egg, oj, orange peel until light and fluffy.  Add the flour and baking powder beating until blended.  Stir in the cereal.  Drop 2" apart on an un-greased cookie sheet.  Bake 10-12 minutes.


OPTIONAL:
1/2 Cup dark chocolate morsels
1/2 Cup Grapenuts
After allowing to cool on a rack, you can add what I believe really makes these delicious! Heat the chocolates in a ceramic bowl in the microwave on 50% heat in short intervals. (Burnt chocolate is terrible!) Stir the chocolate until it is a smooth consistency.  Dip a Schnutz half way into the chocolate and then into a bowl of the Grapenuts and allow to cool.

Enjoy!


Monday, April 7, 2014

St.L: The homeland, of sorts

I took a quick recharge trip to St. Louis to see some good friends and see what that great city was up to. The trip included picking up pieces of freshly cut walnut wood, so that the hubbie can carve some pretties.  Thanks to the many people who helped to orchestrate that, you know it really can take a village.  We had to track down a neighbor, check in with owners of the tree, pick up the pieces and have help... but ended up with 4 good size logs.

Then I spent the afternoon exploring Perennial and some other south city haunts with Claire.  Perennial is a super marvelous concept and shop.  Use old stuff to make new and better stuff.  And by stuff I mean useful meaningful items for your life.

Piles waiting to be turned into treasures.

Origami Map Installation hanging from the ceiling.


Supply Cart!!!
At Perennial you can stop in and take a workshop on how to upcycled necessary items for your home.  Check the website in case you are in STL at the time of a pertinent skill!
We also journeyed to another wonderful spot called the Upcycle Exchange, which is a craft supply shop where you can purchase only what you need- AND- you can name your own price.  I didn't go overboard, but the place was pretty fantastic!  Photos to follow of my nifty finds (mostly yarn...)

Next post will also show off the stacked pie party!