Wednesday, August 20, 2014

Working from nature

Recently, I did a couple of small projects that worked with the world around me.  I have to imagine this is some sort of preparation for the impending winter...


On an early morning walk without Marcel, which coincidentally was kind of a nice change of pace, I found this cool specimen in the road.  The tree from which it came was not anywhere nearby so I am unsure of its origin.  I picked it up to carry it back home.  I thought it was really a lovely thing with all of its leaves and their exotic twists.  I also like the little visible nucleus/seed in each leaf.  


Once home and seated with a coffee, I pulled out some of my sparkly colored pencils and some of my prisma colors that are ancient, going on about 20 years old at this point.  The pencils are tried and true and work like the first time they were used.  I began to sketch from my little bit of nature.  I am still working on the drawing, but it was nice to collect a neat item and spend some time studying it in the studio.


I have, since grad school, been toying with how to dye without all the chemicals.  In my home, there is no safety ventilation system in place.  How do I get to play with color without being toxic to myself and the other family members?  Usually, I am using koolaid on animal fibers- that method will continue to be a favorite.  But, I am still experimenting with dying using more natural ingredients, things I can feel comfortably placing in my cookware.  


On this piece of white tablecloth, with existing stains, I played with some sewn shibori methods and some standard rubber band resists in a coffee dye bath.  Shibori is the Japanese term for tying and then dying.  Vinegar was added to the mixture to assist with color fastness- but I have to say that thus far, I was unimpressed with the results.  I may soon be wrapping the cloth with veggies, stains and other things and laying them in the yard in order to harness the sun's power for helping to dye.  In the end, the coffee grounds did not really adhere to the fabric.  I have also tried purple cabbage, but it too, seemed pretty pale.

Thanks mother nature for your lovelies- I will continue to experiment and keep my eyes open for the curious things you have to offer.

Wednesday, August 13, 2014

Gifts with meaning and practice in making

It is August and I have a ton of buddies with birthdays coming up, it has me in the studio making cards and little special bits to send off through the post office.

I won't give away too much info as this needs to get shipped off yet, but I was recently gifted a large pile of textile treasures and I used some of these as inspiration and as material for cards.

Just a few of the new textile specimen.  I was inspired by the embroidered and printed patterns of these "new" items.
So taking the colors and patterns to the drawing board, I then set to work with my watercolors.  I haven't pulled those out in a bit, so I was a little rusty and mostly playing with color.  

It should be mentioned that I also stole/ borrowed some of AB's paper in order to work on.  He had, I thought, given me a sketchbook from when he used to take art lessons in middle school.  When I told him I used the paper, he acted a little more like I had stolen it. ;)

After getting these little flowers out on paper, I decided to cut them out and play around with making them the decoration on my birthday card envelopes.  
I used Elmer's glue in order to attach the cutouts onto the envelopes.  From there, I pulled some of the more worn textiles, and cut them down in order to fit onto a paper card.  I glued the fabric to the paper and then added some hand stitched embellishments.  I pulled from my collection of colorful bits that are kept in the studio.  
I was also able to write my special birthday message on the back, paper side.  And now I am off to the post office in order to get this little card along with a small gift to its proper recipient.  I am likely going to be belated a day, but hey handmade comes when it comes.  Happy Making!


Tuesday, August 5, 2014

Transferring a drawing into embroidery (onto a kid's one piece.)

Many dear friends are having kiddos so I have been actively making small one of a kind items for these new humans.  I have tried to match the interests of the parents to the designs because forming a kid's personality can never happen too soon!
While researching the term I was going to call the "little kid's one piece suit", I discovered that the main word for which I know it by is copyrighted, so first things first we are calling this a "kid's one piece." No getting sued for improper usage here.
This is a quick tutorial on how to take a drawing, an image from a photo or an existing 2d design and get it onto fabric in order to embroider.  Think carefully about what image you will use.  I like to draw so my primary source is to find a picture on the internet and draw or just use my memory.  For now, the drawings are very simple.  They could be more complicated, but the transfer technique is a little biased due to the wheel tool.  The tool can't make small turns and thus, there are some size restrictions.  There are transfer markers that are permanent or that can be washed out, read the packaging carefully if you choose one of these options.

Here is what you will need to begin:

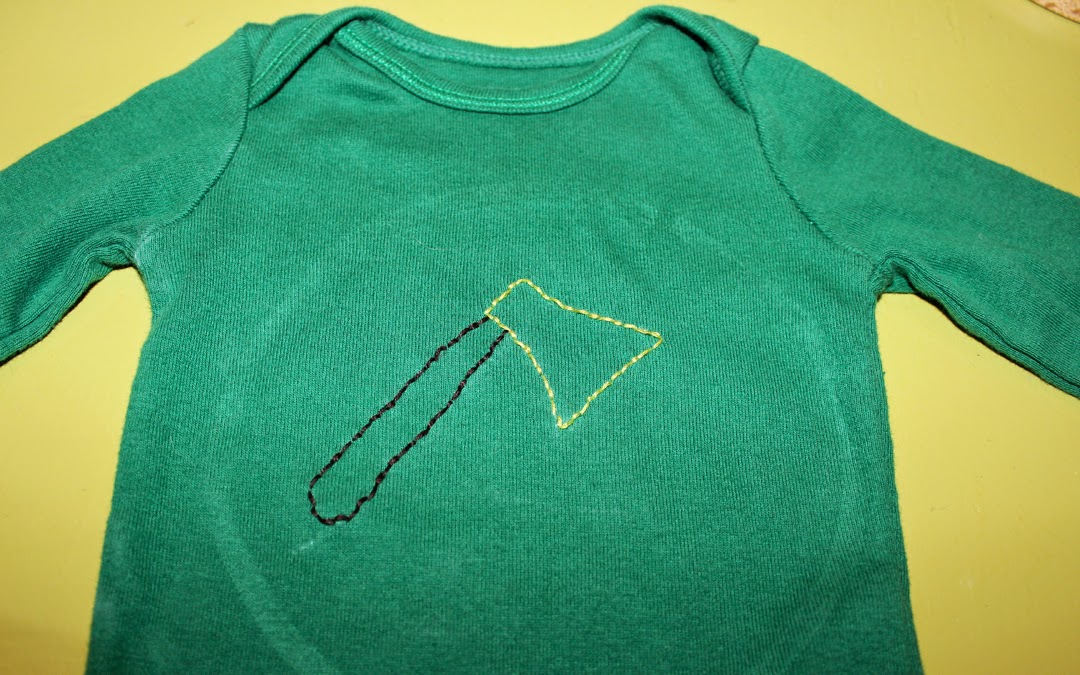
I made a quick drawing of a little lumberjack axe and I chose my white transfer paper so it will show on the hunter green fabric.  I purchased my transfer kit at the local Ben Franklin Craft Store.  That place has everything! 

The next step is to transfer the drawing onto the fabric.  

Begin by making a sandwich with your fabric on the bottom.  Then tracing paper, chalk side down and finally your drawing. If you had a more intricate drawing, I would recommend pinning all pieces together so there is no shifting.  The next step is to roll the wheel with medium to firm pressure over the lines you want to transfer.  I find it helpful to trace a couple of times to ensure a good image.


You can see one of my other recent transfers faintly behind the axe.  The next step is to install your embroidery hoop.  I have found that the best method is to place the center piece of the hoop in from the bottom of the one piece.  Be careful about touching your drawing, the chalk can begin to wipe off and will fade as you work.


Next I plan out my color use and begin to follow the chalk outline with a backstitch. Depending on the drawing, I will sometimes get into fancier embroidery work.  It all depends on the look I am going for.


This is the finished kid's one piece.  If there are any stray marks, they will come out after a quick run through the washer and dryer.  I hope to have some of these garments modeled in the coming months. Happy stitching!  


Friday, August 1, 2014

Fashion Friday: AUGUST: how is that possible?

August here, today in fact is the first day of August.  I am impressed.  Not sure where the previous few months got off to.  But here we are.  I hopped out into the garden to inspect the curiosities that abound.  
Curiosity number 1: Crazy tomatoes that look a bit like Audrey 1
While I was just lamenting the speedy passage of time, I have to say that I can't wait until this babies are ripe!  They look so weird that they have to taste super duper.

Curiosity number 2: Weed Dating
So I heard about a cool thing that a friend recently did, called weed dating.  A community garden gathers their volunteers for these events and everyone plunks their butts to the ground and starts getting their hands dirty.  You meet people but there are no pretenses and as my friend stated, if you happen to go on a date with one of your digging buggies you don't really feel like you have to dress to the nines. You met with dirt on your hands.  

Curiosity number 3: Cool flying things in the sweet pea!

I enjoy seeing some bumble bees in our sweet pea, but we also had a neato beetle today.  So, now I am torn, I was plotting pulling the sweet pea in order to make more room for strawberries.  I guess they may have to share the space because I don't want to run the bees off.  And I don't necessarily want the bees all over my berries! 

The final curiosities lay ahead! Where will these guys take me?


Saturday, July 26, 2014

Make Make Make Grow Grow Grow Nom Nom Nom

The later part of May had us feeling behind on our gardening.  At the end of the month we noticed that the neighbors down the street who "know what they are doing" had planted, so we didn't feel so bad that our first round of indoor seeds needed to start again.  We used that time to build these 4 boxes on the side of the house.


Our four planters are 2'x6' each and run the length of the south side of the house which gets a ton of sun.  I am also looking forward to piling all our snow on top of them later this winter (well I will enjoy it the first 5 times and no more thereafter.)  We used about 1.5 yards of topsoil from Purple Cow Organics in order to fill the boxes and once the weather finally got warm (and we saw that the folks down the block had planted) we placed our seeds in using the square foot gardening method as our guide. Some things have grown, others have not.  

The white object at the upper right end of the garden is Marcel.  I think he is chasing a chipmunk into our storm drain.
This is the garden now about two months later! Holy cow.  We have enjoyed beans, radishes, lettuce, cucumbers and squash and there is more of all that coming.  The weather has provided lots of rain, and we just add when we need a little extra push.  I am looking forward to learning from what didn't take well this year and adding in some other items next year.  We have strawberries in another location and that may get a complete overhaul next season because they are thieved by birds, bunnies and chipmunks now.  The strawberry plants are spreading themselves out, so if we can enclose them I think we just might get a bumper crop.  

Here is a future heirloom tomato.  Thanks to Miriam for the awesome seeds for our wedding shower last year.  This little wrinkly guy makes me real happy. 


Thursday, July 17, 2014

Machine Knitting class at Shake Rag Alley Center for the Arts

Looking for something fun to do August 1, 2 and 3, 2014 in the Driftless region of Wisconsin?


Carole Spelic', an artist and educator from MP, and I will be teaching a machine knitting class. Machine knitting is a slightly mechanized method used to knit items.  The machines speed up some processes and allow you to work more quickly through basic techniques while also freeing you up to experiment with advanced techniques that you might not try in hand knitting.  I love my machines, and also occasionally curse them as there are quirks.  SO before buying one or leaving one to gather dust in your basement, come learn the basics from Carole and I.  Carole teaches fibers courses at UW Platteville and is an avid fiber artist on her own time.  She also plays a nice upright bass.  I have some unique skill sets but mostly prefer to cultivate the textile ones.  We would love to have you come to Shake Rag Alley Center for the Arts in Mineral Point, WI and take this really cool course with us.  Please follow the link for more information on the set of classes or an individual one.

Machine Knitting

Tuesday, July 1, 2014

Things we've been making

We've been moderately busy around here band practicing, gardening, remodeling, crafting and learning new skills in general.

AB tuning up at SummerFest 2014.  Well performed, Hell on Heels!
Our garden is a bit out of control- amazing that I was worried about getting things into the ground late.  We will have future reports from here!

Interior of a cherry bowl that AB is turning.  Stay tuned as items will be making their way to Etsy.


Marcel enjoying his new crabby pool, or mostly making giant muddy messes in the yard.


Making a template for a window shelf.  AB instructs how to use the compass to make the job easier.  I suspect I learned this is math class some time long ago. This was about day 5 of the nail challenge and they were doing pretty well.

Enjoy!