
While researching the term I was going to call the "little kid's one piece suit", I discovered that the main word for which I know it by is copyrighted, so first things first we are calling this a "kid's one piece." No getting sued for improper usage here.
This is a quick tutorial on how to take a drawing, an image from a photo or an existing 2d design and get it onto fabric in order to embroider. Think carefully about what image you will use. I like to draw so my primary source is to find a picture on the internet and draw or just use my memory. For now, the drawings are very simple. They could be more complicated, but the transfer technique is a little biased due to the wheel tool. The tool can't make small turns and thus, there are some size restrictions. There are transfer markers that are permanent or that can be washed out, read the packaging carefully if you choose one of these options.
Here is what you will need to begin:

I made a quick drawing of a little lumberjack axe and I chose my white transfer paper so it will show on the hunter green fabric. I purchased my transfer kit at the local Ben Franklin Craft Store. That place has everything!
The next step is to transfer the drawing onto the fabric.
Begin by making a sandwich with your fabric on the bottom. Then tracing paper, chalk side down and finally your drawing. If you had a more intricate drawing, I would recommend pinning all pieces together so there is no shifting. The next step is to roll the wheel with medium to firm pressure over the lines you want to transfer. I find it helpful to trace a couple of times to ensure a good image.

You can see one of my other recent transfers faintly behind the axe. The next step is to install your embroidery hoop. I have found that the best method is to place the center piece of the hoop in from the bottom of the one piece. Be careful about touching your drawing, the chalk can begin to wipe off and will fade as you work.


Next I plan out my color use and begin to follow the chalk outline with a backstitch. Depending on the drawing, I will sometimes get into fancier embroidery work. It all depends on the look I am going for.
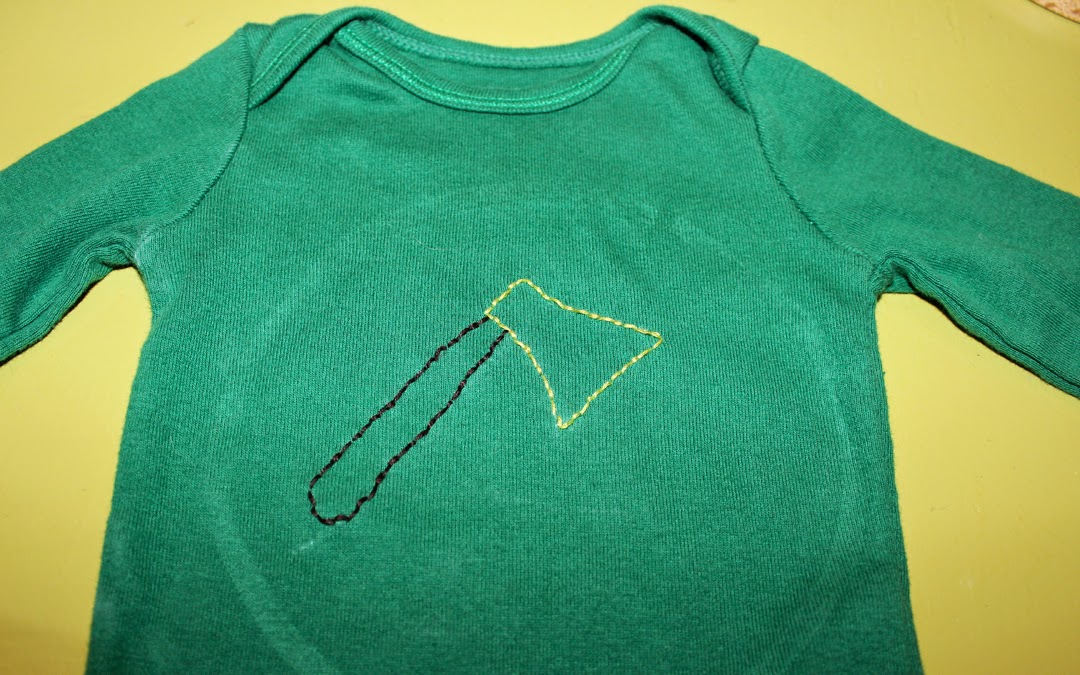
This is the finished kid's one piece. If there are any stray marks, they will come out after a quick run through the washer and dryer. I hope to have some of these garments modeled in the coming months. Happy stitching!
No comments:
Post a Comment